


Pipes as per
IS:13592

Fitting as per
IS:14735
EXTENSIVELY USED IN

HOSPITAL

RESIDENTIAL

HOTEL
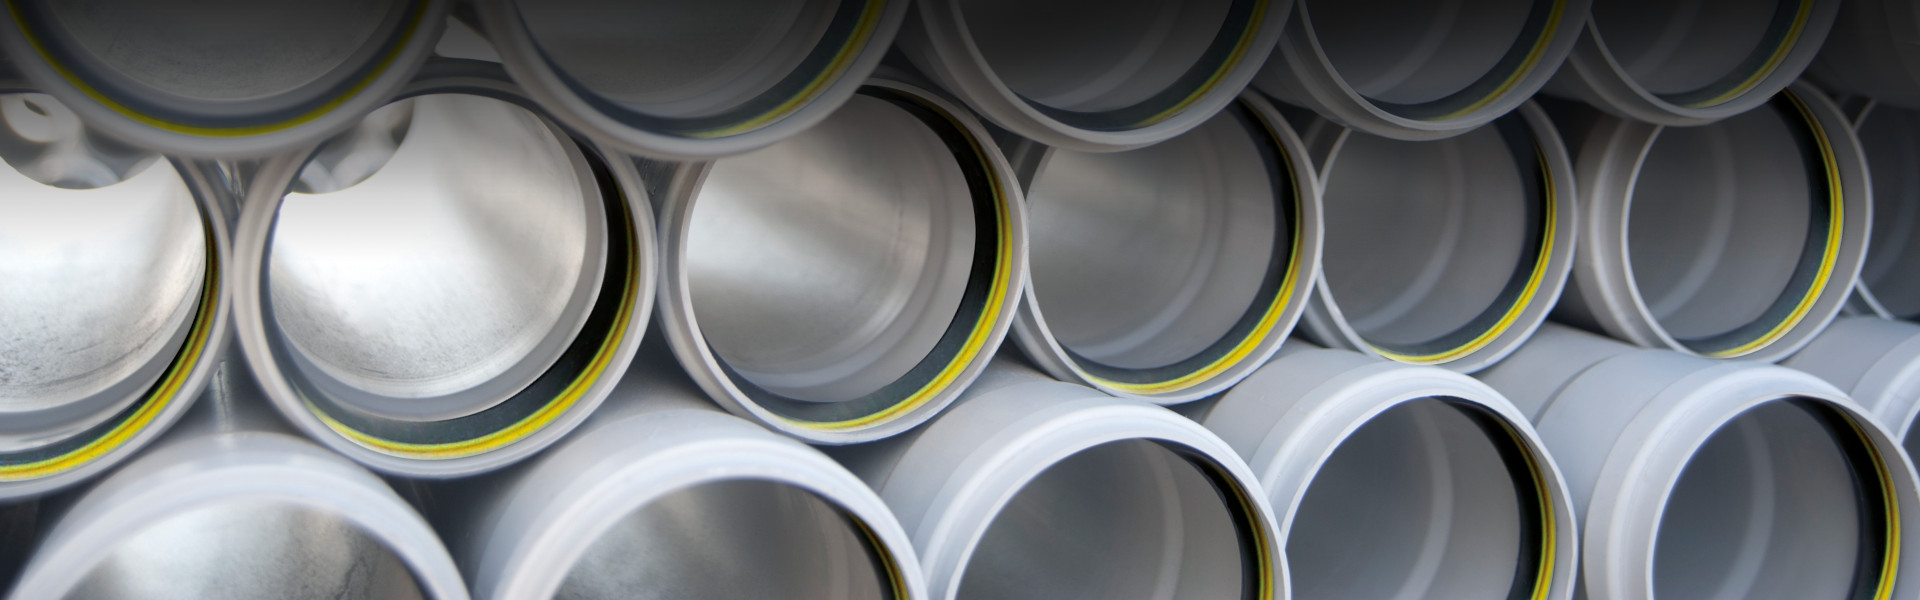
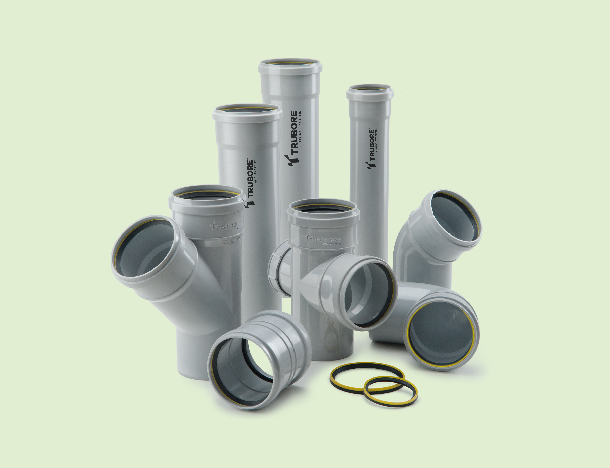
SWR Pipes & Fittings
Trubore SWR pipes & fittings are made of unplasticized polyvinyl chloride material. This piping system is used for draining used water from industrial as well as residential buildings to sewers. Trubore offers the pipes and fittings in 2 types namely – the Rubber Ring and Solvent Joint and are classified into Type ‘A’ & Type ‘B’. Type ‘A’ are used for rainwater discharge and ventilation whereas Type ‘B’ pipes are used for solid and waste discharge.
APPLICATIONS
- Inside & outside building drainage systems including ventilation.
- Rain water discharge & harvesting for residential and commercial buildings/complexes.
MAJOR ADVANTAGES
- Lighter than conventional C.I. pipes but strong.
- Compatible with other drainage products.
- Easy to install with low assembly force.
- Smooth bore.
- Leak-proof joints.
- Long-term sealing performance.
- Cost-effective.
- World-Class Seals stronger than locally available seals.**
- Long life.
PIPE DIMENSIONS
| Pipe Size (mm) |
Mean Outside Diamater (mm) |
Wall Of Thickness(mm) | ||||
|---|---|---|---|---|---|---|
| Type ‘A’ | Type ‘B’ | |||||
| Min | Max | Min | Max | Min | Max | |
| 40 | 40.00 | 40.30 | 1.80 | 2.20 | 3.20 | 3.80 |
| 50 | 50.00 | 50.30 | 1.80 | 2.20 | 3.20 | 3.80 |
| 63 | 63.00 | 63.30 | 1.80 | 2.20 | 3.20 | 3.80 |
| 75 | 75.00 | 75.30 | 1.80 | 2.20 | 3.20 | 3.80 |
| 90 | 90.00 | 90.30 | 1.90 | 2.30 | 3.20 | 3.80 |
| 110 | 110.00 | 110.40 | 2.20 | 2.70 | 3.20 | 3.80 |
| 160 | 160.00 | 160.50 | 3.20 | 3.80 | 4.00 | 4.60 |
SWR PIPE FITTINGS
Rubber Ring
BEND 45°
Know MoreBEND 87.5°
Know MoreBEND WITH DOOR
Know MoreCLEANSING PIPE
Know MoreCOUPLER
Know MoreDOUBLE Y°
Know MoreDOUBLE Y WITH DOOR
Know MoreREDUCER
Know MoreREDUCING TEE
Know MoreREDUCING TEE WITH DOOR
Know MoreSINGLE T
Know MoreSINGLE T WITH DOOR
Know More
Solvent Joint
BEND 45°
Know MoreBEND 87.5°
Know MoreBEND 87.5° DOOR
Know MoreCLEANSING PIPE
Know MoreCOUPLER
Know MoreDOUBLE T
Know MoreDOUBLE T DOOR
Know MoreDOUBLE Y
Know MoreDOUBLE Y DOOR
Know MoreREDUCER
Know MoreREDUCING TEE
Know MoreREDUCING TEE DOOR
Know MoreTraps
MULTI FLOOR TRAP WITH JALI
Know MoreMULTI FLOOR TRAP WITHOUT JALI
Know MoreNAHANI TRAP WITH JALI
Know MoreNAHANI TRAP WITHOUT JALI
Know MoreP TRAP
Know MoreP TRAP (SHORT)
Know MoreDO’S & DONT’S
SWR Piping Systems with Elastomeric Sealing Ring Joint
JOINTING & INSTALLATION

- It is imperative to mark the pipe from all sides so that pipe is cut with the help of a Hand Saw. It should be a right angle cut from all the sides. The cut piece should not be with burr on the edges.
- (This step is required when pipe cutting is done from 3 meter pipe to any required length during installation) After cutting, the pipe needs to be chamfered from the outer sides of the pipe. It is advisable to provide approximately 2mm wide, 150 chamfer on pipe end.
- Push the pipe inside the fitting till marked end is completely inserted equally from all sides.

- Do not cut slant/unevenly.
- Do not proceed with installation of pipe without chamfering.
- Do not use a hammer or half push the pipe.
CHAMFERING
- Remove all the burrs and ridges accumulated on the inner as well as the outer edges of the pipe with the help of a deburring knife, file or abrasive paper.
- Do not proceed with the installation of pipe without deburring.
DEBURRING AND RIDGE REMOVAL
- Thoroughly clean the pipe with dry cloth where the solvent cement is going to be applied to avoid dust, dirt, oil, moisture and other foreign materials during the installation process.
- Do not join the pipes without CLEANING cleaning the pipe ends.
DRYFIT TEST
- Before applying solvent cement, insert the swr pipe end into the socket of the next pipe or fitting to check that interference occurs at about 1/3rd to 2/3rd of the socket depth.
- Mark the pipe length to be inserted for jointing. Apply a liberal coat of lubricant for easy and smooth insertion.Do not insert the pipe and fitting
- Do not apply solvent cement without conducting Dryfit Test.
LEAKAGE TEST
- Leakage tests may be carried out at 0.5 kg/cm2 pressure for 15 minutes. Ensure proper alignment and avoiduse of damaged rubber rings if any.
- Pipe line should be installed in proper alignment and along with necessary clamps.
- Pressure tests may be carried out at 0.5 kg/cm2 pressure for 15 minutes.
- Avoid loose joints & misalignments.
- Pressure testing should not be done before 24 hours of curing.
SWR Piping Systems with Solvent Joint
CUTTING
- It is imperative to mark the pipe from all sides so that pipe is cut with the help of a Hand Saw. It should be a right angle cut from all the sides.The cut piece should not be with burr on edges.
- Do not cut slant/unevenly.
CHAMFERING
- (This step is required when pipe cutting is done from 3mtr pipe to any required length during installation) After cutting, the pipe needs to be chamfered from the outer sides. It is advisable to provide an approximately 2mm wide, 150 chamfer on spigot end.
- Do not proceed with installation of pipe without chamfering.
DEBURRING AND RIDGE REMOVAL
- ThoroRemove all the burrs and ridges accumulated on the inner as well as the outer edges of the pipe with the help of a deburring knife, file or abrasive paper.
- Do not proceed with installation of swr pipe without deburring.
DRYFIT TEST
- Before applying solvent cement, insert the swr pipe end into the socket of the next pipe or fitting to check that interference occurs at about 1/3rd to 2/3rd of the socket depth.
- Do not apply solvent cement without conducting Dryfit Test.
CLEANING
- Thoroughly clean the pipe with dry cloth where the solvent cement is going to be applied to avoid dust, dirt, oil, moisture and other foreign materials during the installation process.
- Do not join the pipes without cleaning the pipe ends.
APPLICATION OF SOLVENT CEMENT
- Mark the pipe length to be inserted for jointing. Apply a liberal coat of solvent cement with the help of the brush on the marked surface.
- Do not apply excess solvent cement on the swr pipe and do not use solvent cement by hand.
JOINTING
- Push the swr pipe inside the fitting/pipe so that it goes inside equally from all the sides. Wipe off excess solvent cement that comes out from all the edges. Hold the joint for one to two minutes so that the jointing is perfect.
- Do not use a hammer or half push the pipe.
INSTALLATION & COMMISSIONING
- Pipe line should be installed in proper alignment & along with necessary clamps.
- Pressure testing may be carried out after a curing period of 24 hours.
- Avoid loose joints & misalignment.
- Pressure testing should not be done before 24 hours of curing.